I’m so excited to be collaborating with my friends at the feedfeed and one my favourite stores, Williams-Sonoma to bring you this festive recipe for peppermint bark rice krispy squares! #BarkYeah. The perfect holiday twist on a classic treat.

I hadn’t tried the bark up until this year but after trying it, it will definitely be a new staple in my home around the holidays. It is seriously addicting. Here is a little info on the bark from William-Sonoma:
It’s handmade from custom-blended Guittard premium chocolate, infused with natural peppermint oil, layered with creamy white chocolate and finished with a snowfall of crisp handmade peppermint candy bits.
- An original Williams-Sonoma recipe and our beloved holiday tradition.
- Prepared using time-honored confectionery techniques.
- Master candymakers pour semisweet chocolate onto a confectioner’s table, then add a layer of creamy white chocolate. A sprinkling of crisp handmade peppermint candy bits offers an inspired contrast to the rich, velvety smoothness of the world-class chocolate.
Sounds not bad right?
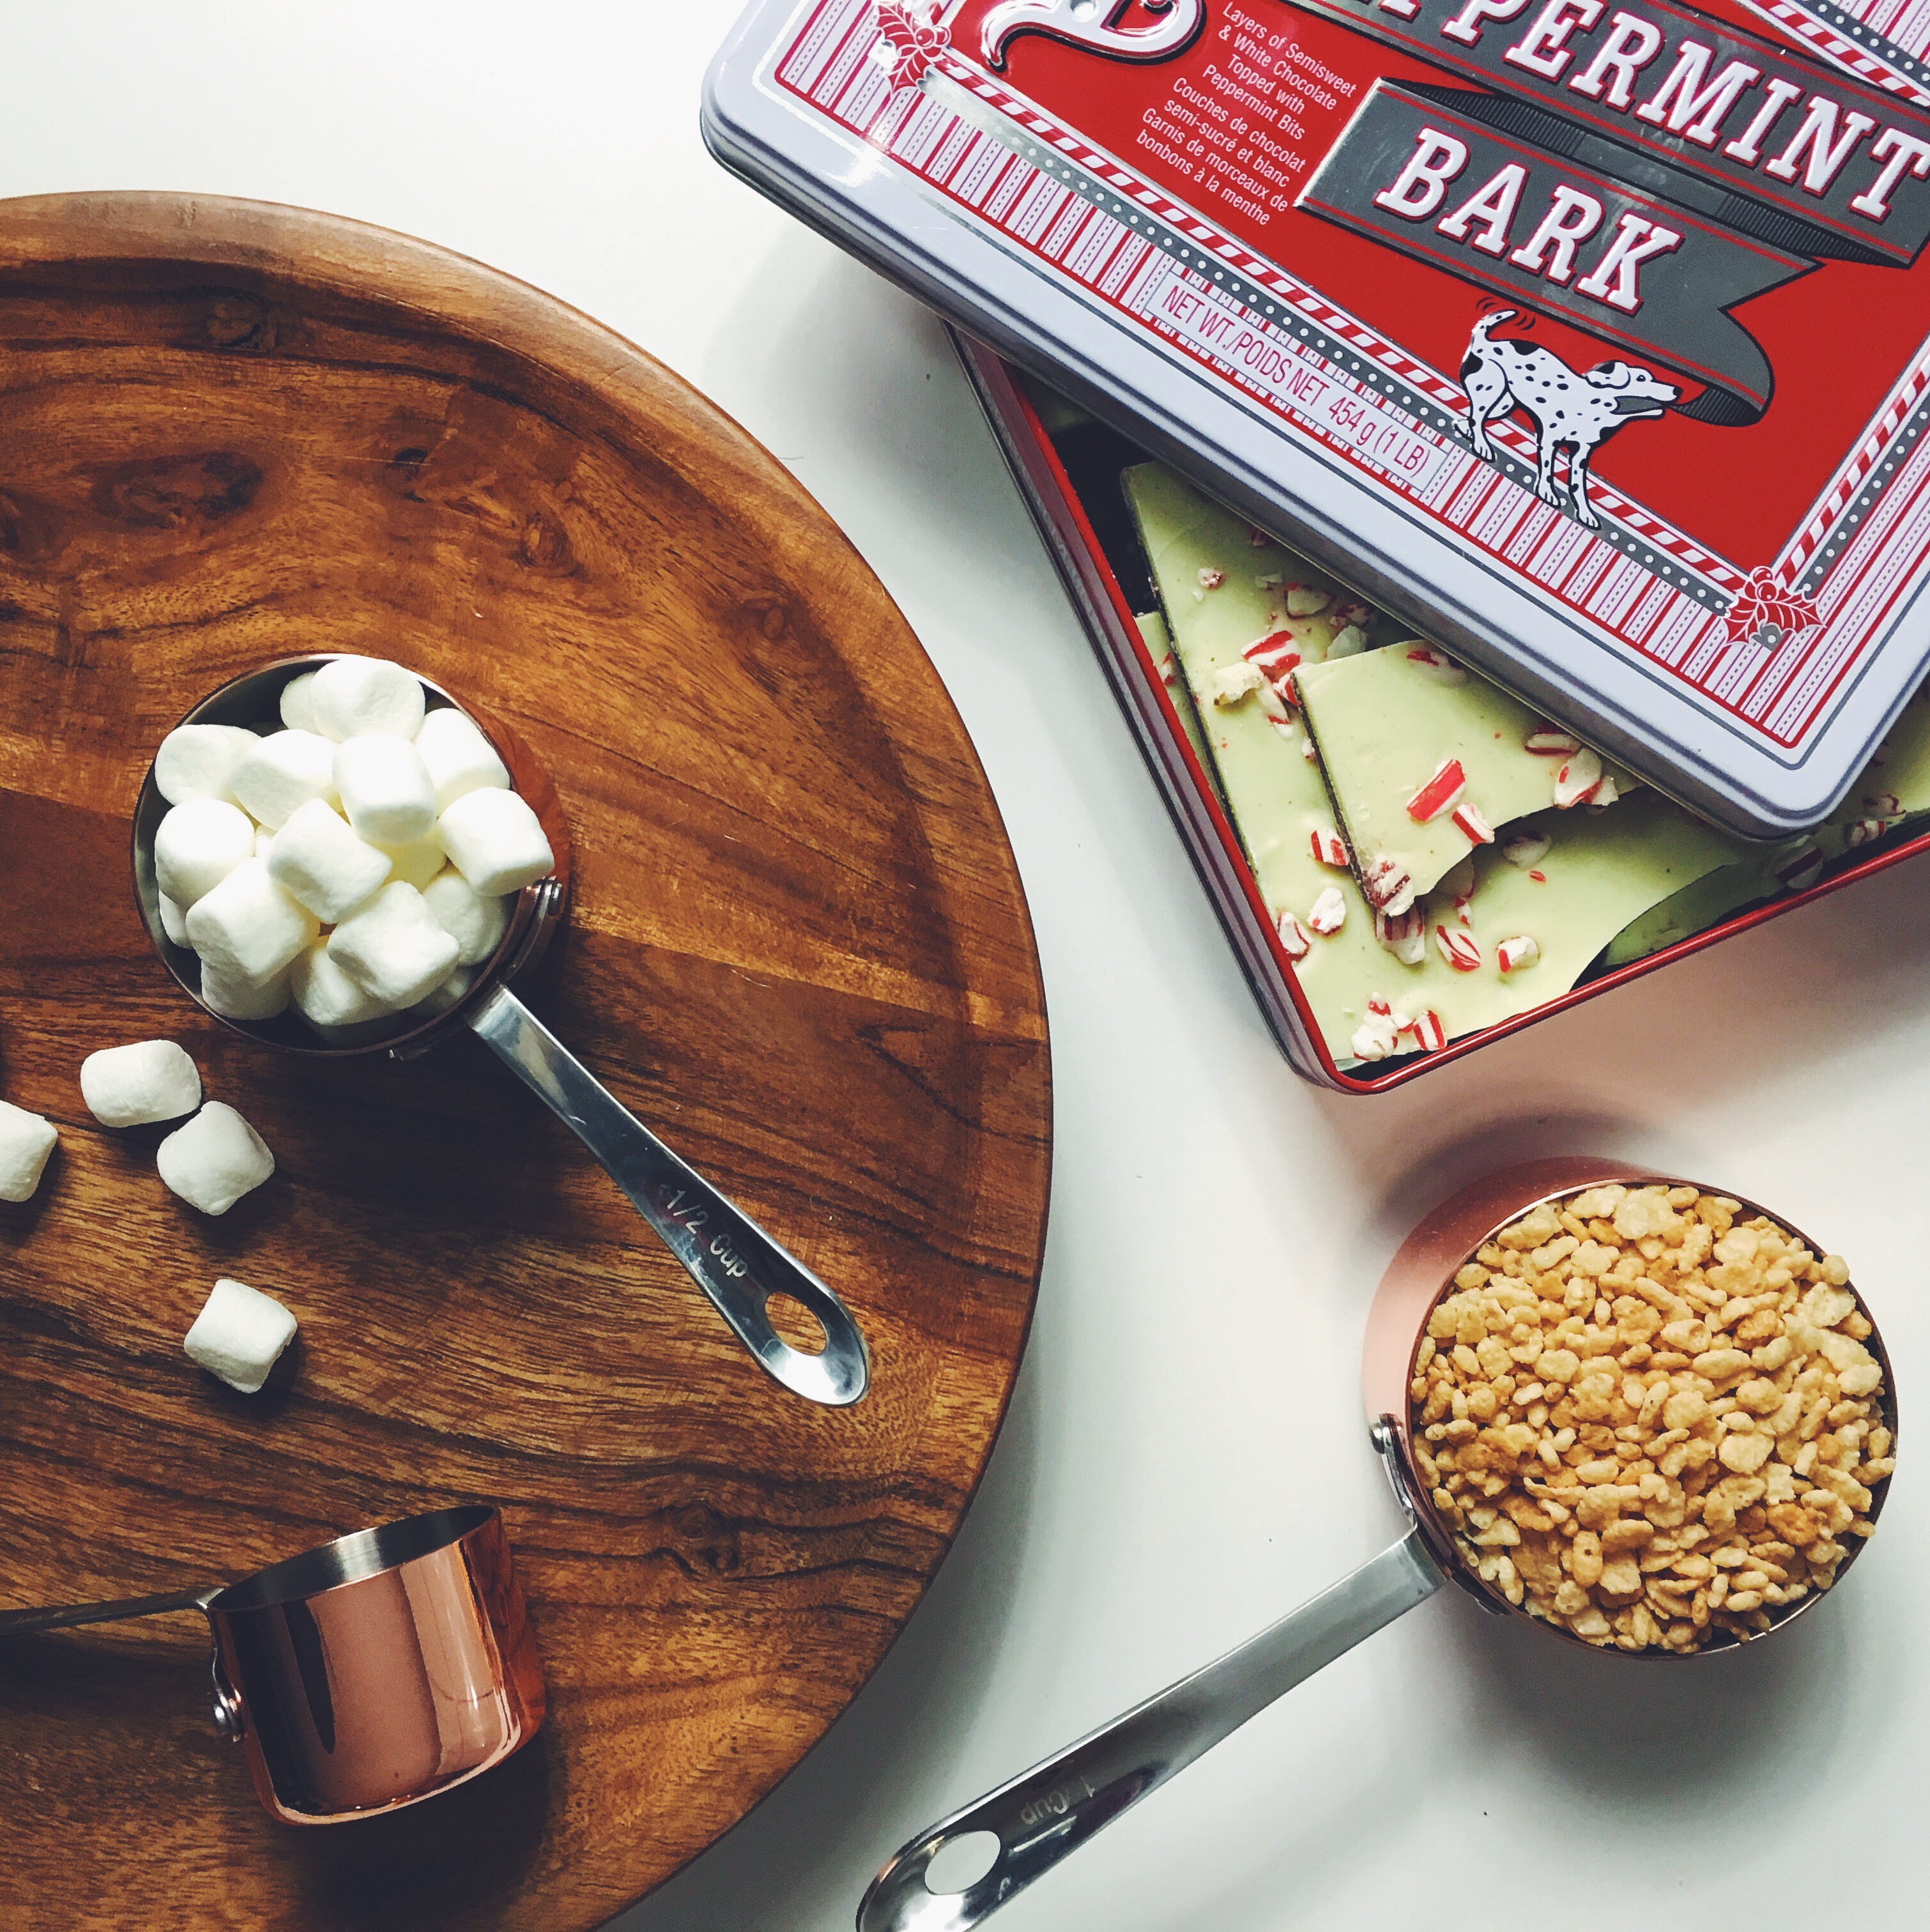
All the props in these shots can be found at Williams-Sonoma.
I love these copper measuring cups and wooden spoons.
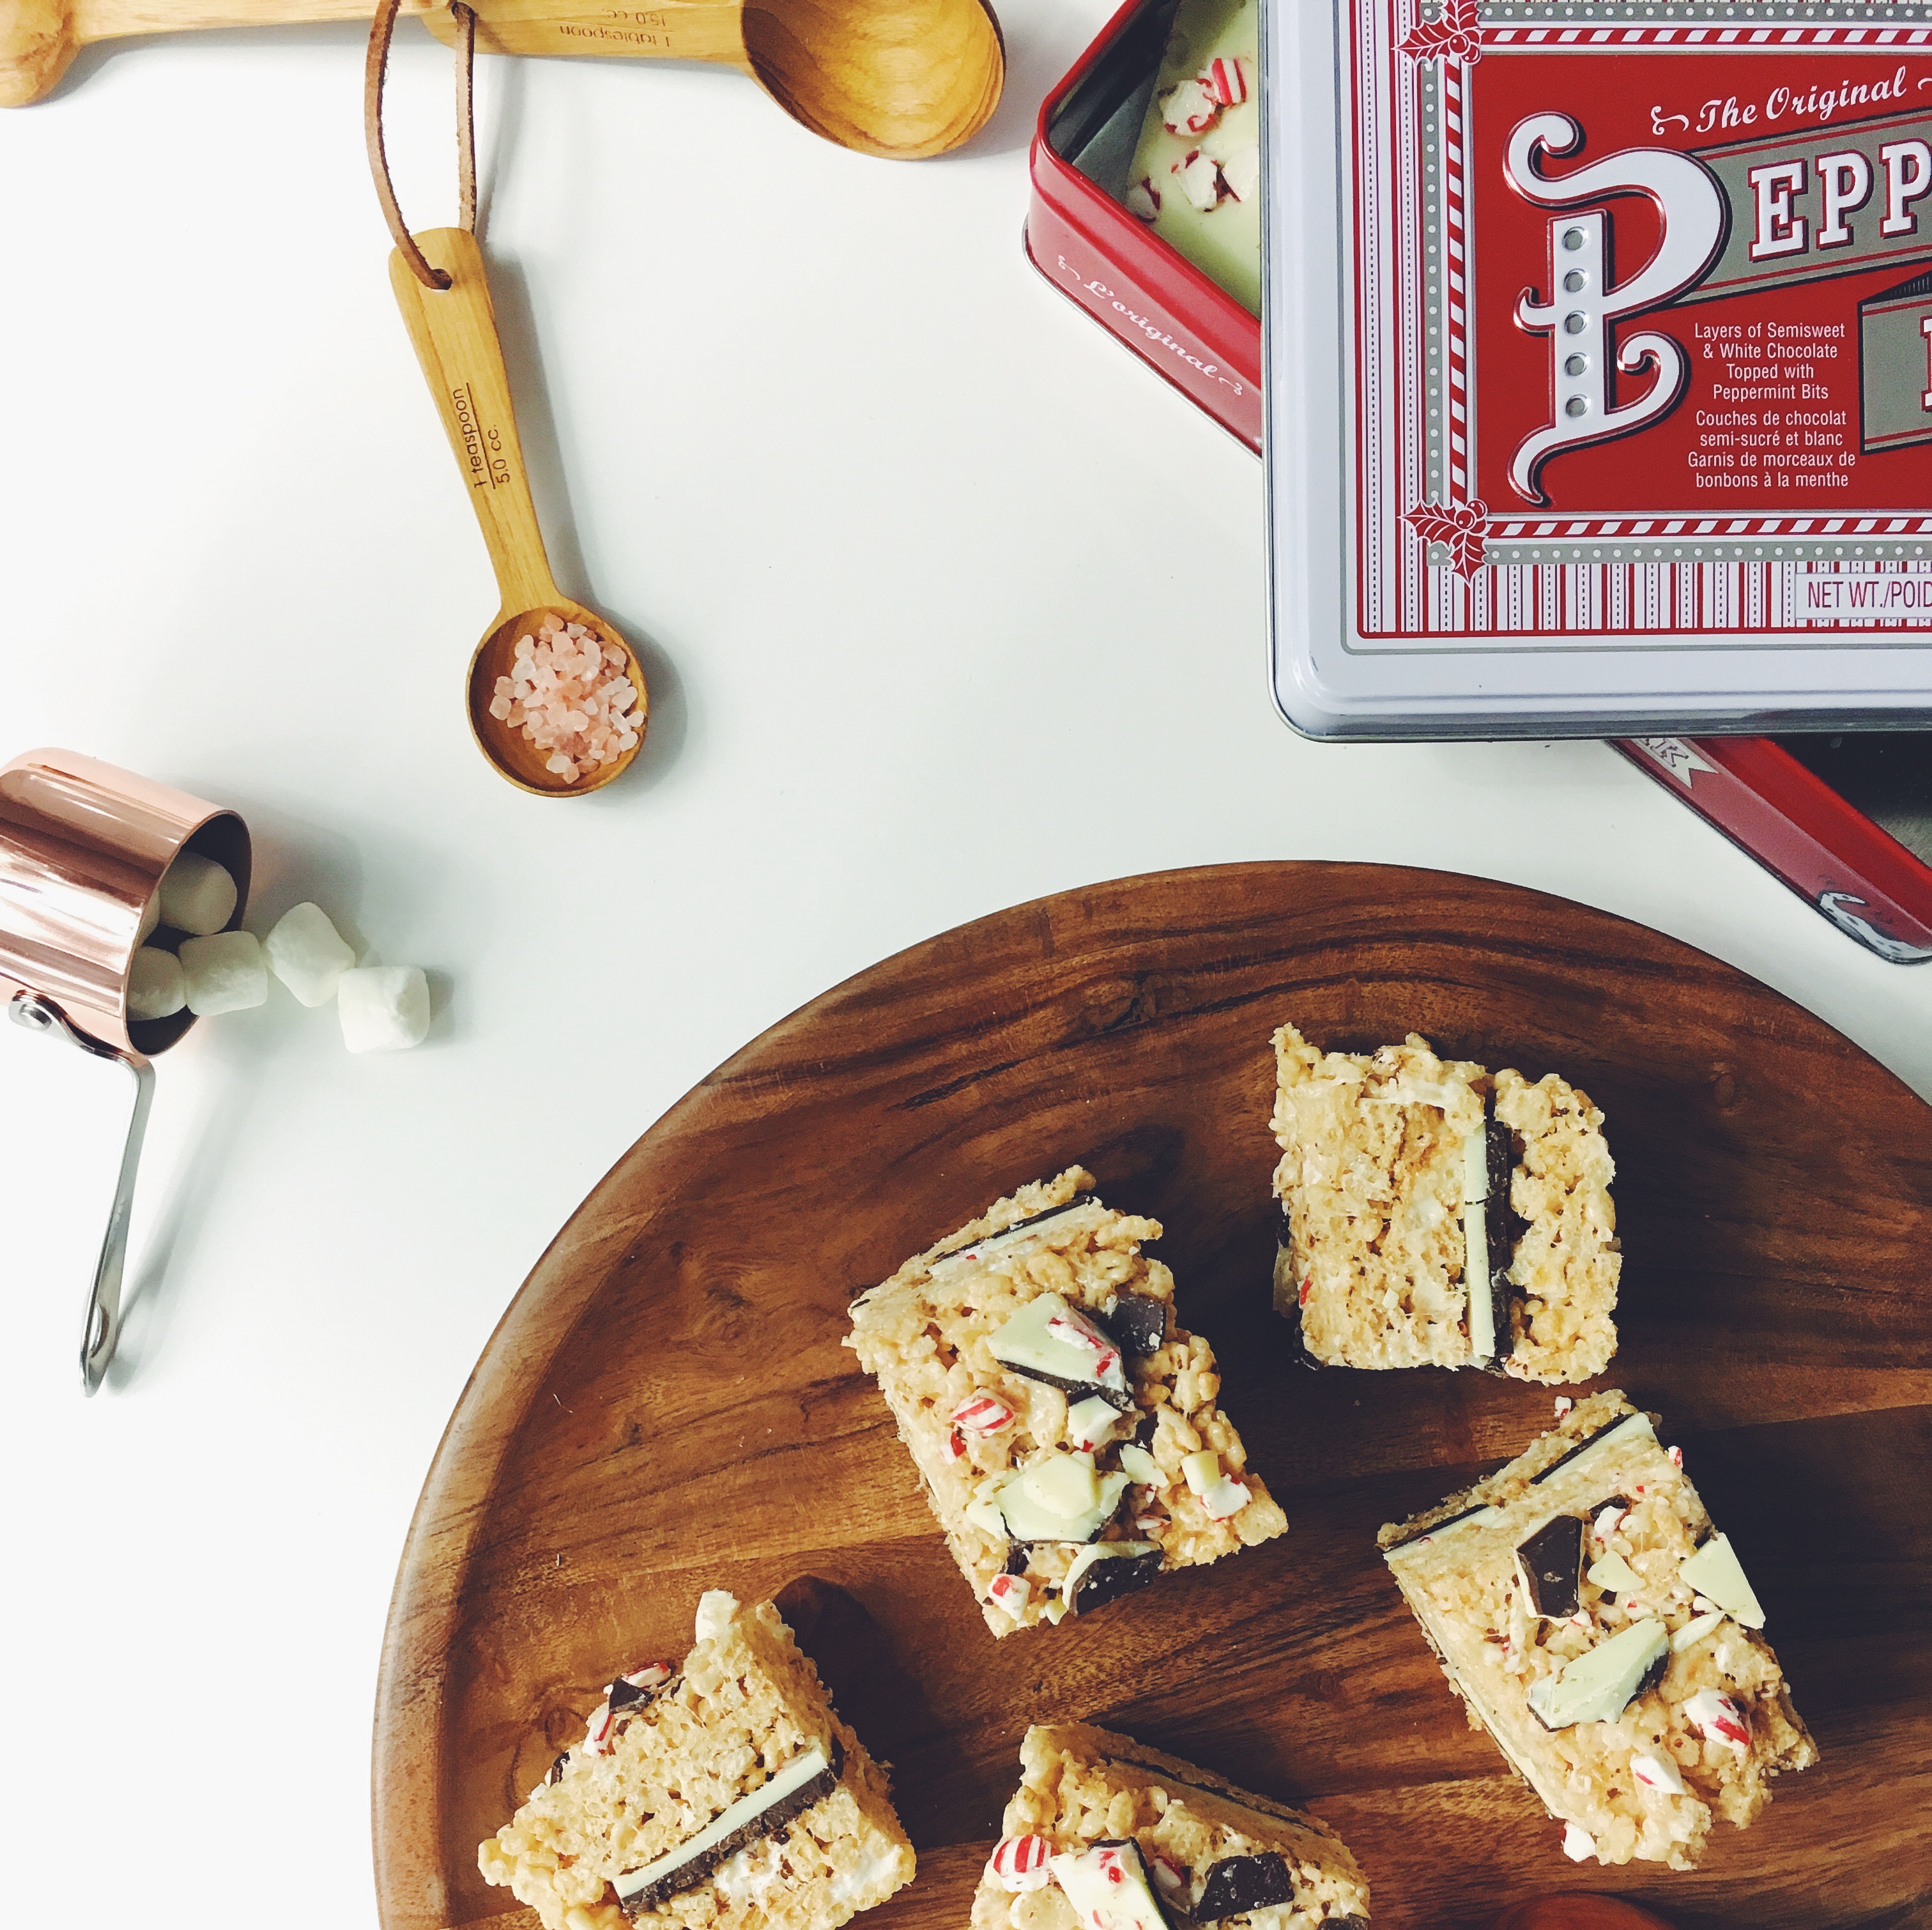
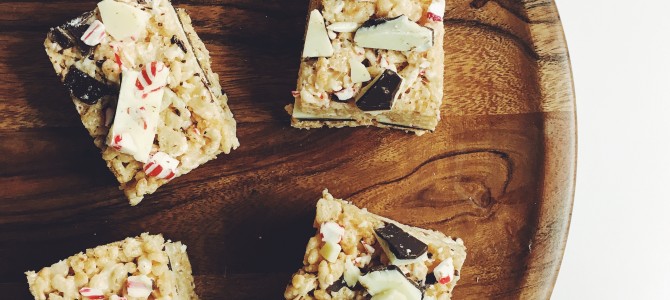
Peppermint Bark Rice Krispy Squares
Ingredients
- Peppermint Bark
- 6 cups Rice Krispies
- 4 cups mini marshmallows
- 3 tbsp butter
- Sea salt
Method
- Take a few large pieces of the bark and roughly chop it, set aside.
- In large saucepan, melt butter over low heat. Add the marshmallows and occasionally stir until melted. Add the rice krispies and stir well to combine.
- Working quickly, spread half the mixture into a greased baking pan and press it down into a uniform layer. Place a layer of peppermint bark on top using large pieces (it doesn’t have to be perfect). Spread the remaining Rice Krispy mixture on top and once again, press down into uniform layer. While still warm and sticky, sprinkle the top with a layer of crumbled bark and press down slightly to ensure it sticks.
- Allow to cool then cut it to squares.