post

Homemade Caramel Apples with Skor and Peanuts

Homemade Caramel Apples with Skor and Peanuts

Caramel Apples

Hard to believe that Halloween is already here. Not really complaining though.  Fall is a great time of the year and there are so many great fall recipes that I’d like to make.  These caramel apples just happen to be one of them.

Making caramel apples at home is pretty simple but for some reason I haven’t always gotten the best results.  The main issue that I had, and I think it’s an issue that others struggle with as well is getting the caramel to stick to the apples.  What would usually happen to me was I would make the apples, stick them in the fridge to set, only to find that when I came back to check on them, most of the caramel had dripped down to the bottom of the apple.

Caramel Apples

After a few quick searches on google I finally have found the solution.  Apples have a waxy coating around them.  I’m not going to get into any details about it, but the one relevant thing about the wax is that it stops the caramel from properly adhering to the apple.  I figured that washing the apples under cold running water was enough to get rid of the coating but apparently not.  The real trick is to dip the apples into boiling water with a splash of vinegar added to it and then shock them in cold water and rinse them off.  This technique will get rid of the wax and ensure the caramel sticks.

Caramel Apples

Since I learned about this trick, my apples have been coming out perfect.  Another tip is to make sure you put the apples in the fridge as soon as possible after dipping them.  This will help the caramel set and reduce any big pools of caramel at the bottom of the apple.  I actually kept a parchment paper lined baking sheet in the fridge while I was making my apples so it would be nice and cold by the time they were ready.

Other than that, there really isn’t much to it. I don’t bother making my own caramel for these, I think the pre packaged caramels work perfect.

Caramel Apples

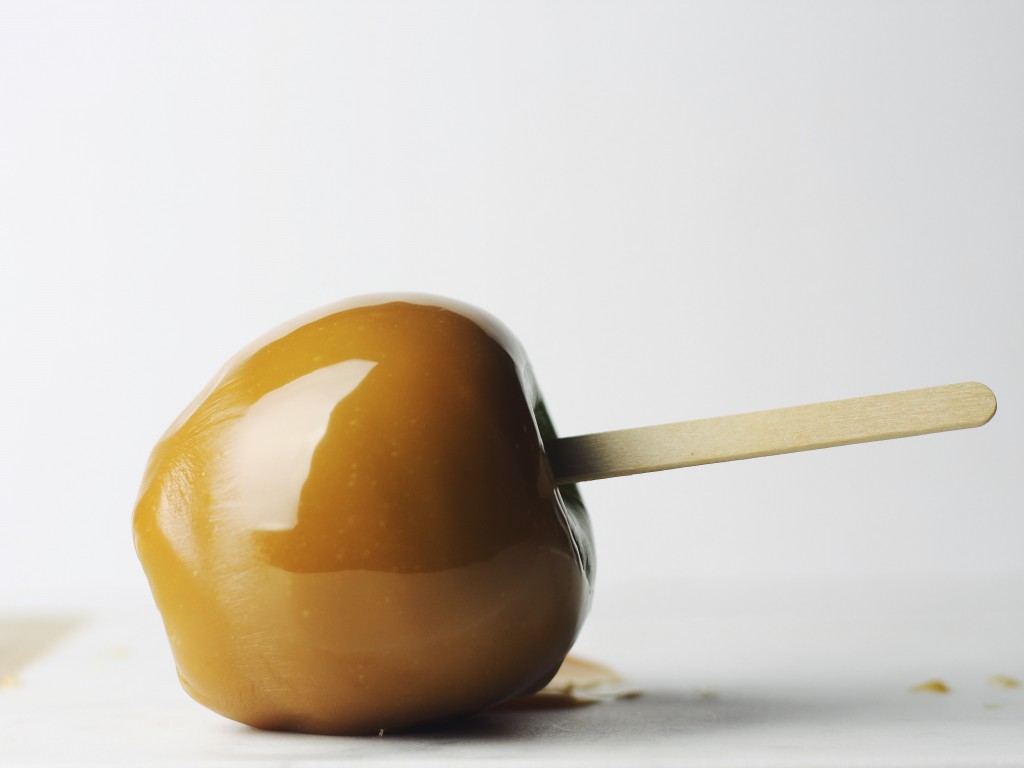
As far as sticks go, there are several options.  You can buy wooden craft sticks at any crafts store. Chopsticks also work pretty well if you have those lying around.  But I find that popsicle sticks actually work the best.  The flat surface seems to help keep a secure fit while dipping.

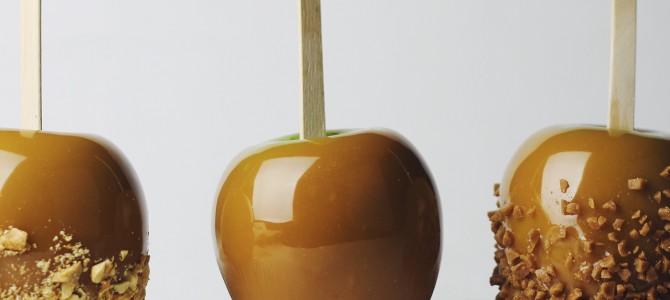
You can stick with just caramel for a classic look, but it’s also fun to dress the apples up with different toppings.  I kept it simple and went with skor bits and chopped peanuts, but the possibilities are pretty endless.  You could add chopped pretzels, m&m’s chocolate chips, drizzled chocolate; you get the point.

Caramel Apple Dip

Ingredients

  • 6 apples (granny smith)
  • 1 package of caramel squares (14 oz) (you might need a little more depending on size of apples so a bit extra couldn’t hurt)
  • 2 tablespoons Cream (milk will work too)
  • splash of vanilla
  • pinch of salt
  • 6 popsicle sticks
  • Optional Toppings (skor bits, chopped peanuts)

Method

Melt the caramels along with the cream, vanilla, and salt in the microwave on 50% power (stirring every minute) or over a double boiler.  Remove the stems from the apples and insert the popsicle sticks. If you have a thermometer, you’ll want the caramel to be between 180° and 200°F while dipping.  It’s not too important to worry about though.

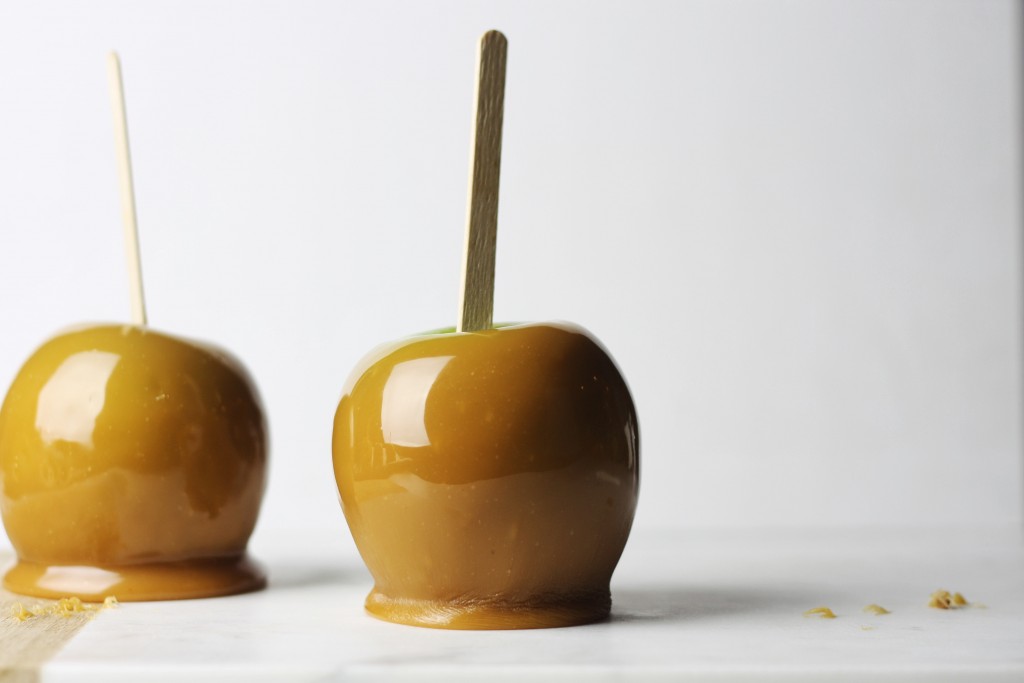
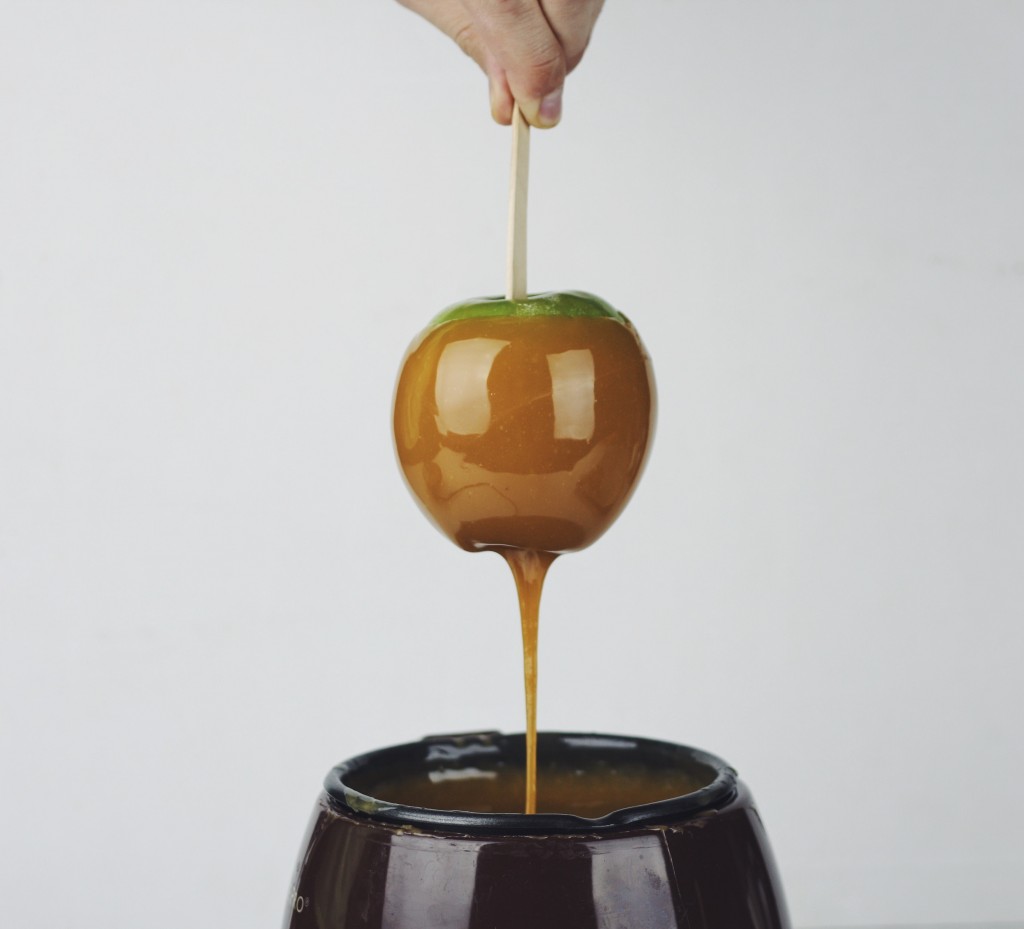
One by one dip the apples into the caramel.  I like to leave a bit of green showing but you can go right up to the stick if you prefer. You may need to tilt the bowl/pot and rotate the apple to get full coverage.  lift up the apple and hold it for at least 30 seconds so the excess caramel drips off.  Flip it upside down for another 15-30 seconds while the caramel evenly spreads around the apple and then place on a parchment paper lined baking sheet.

You’ll find that you may need to hold the apple for a bit longer or in different orientations in order to keep an even layer of caramel all around the apple.  It takes a bit of practice but you’ll get the hang of it after a few tries.

post

Creamy Pumpkin Bucatini with Bacon

Creamy Pumpkin Bucatini with Bacon

Pumpkin pasta

If you read my last post on pumpkin cinnamon rolls, you’ll know that I was never much of a pumpkin fan.  I didn’t necessarily not like it, it was just something that I tended to avoid for whatever reason.  After making those rolls and really enjoying them, I had a whole bunch of leftover pumpkin purée that I needed to use up.

I was in the mood for pasta and I knew that pumpkin would make a great base for a sauce.  One of the great things about this recipe, and many other pasta recipes is that it can be made with ingredients that you probably already have in your pantry and fridge.  I used a few fresh ingredients like sage and thyme but if you don’t have those, you could easily skip it or use dried herbs.

Pumpkin pasta

Dried pasta is also something that I always have around. If you aren’t familiar with Bucatini, its kind of like a thick spaghetti.  It’s really good and perfect for hearty sauces like this or something like a bolognese.  If you don’t have it, regular spaghetti is a good substitute.

Also, you can easily make few substitutions to make this pasta vegetarian.  Obviously skip the bacon.  You don’t need to replace it with anything but I think a good textural substitute is sun-dried tomato.  They go crispy but still keep their chew when fried kind of like thick cut bacon.  And you can swap the chicken stock with vegetable stock or even just some extra pasta water.

Pumpkin pasta

Make sure you taste the sauce and season it to your liking as you’re cooking.  I like to add a little bit of salt here and there throughout the cooking process. As the sauce cooks, the flavors change and meld together.

Needless to say, I will definitely be making this pasta again.

Creamy Pumpkin Bucatini with Bacon

Serves 4-6

Ingredients

  • 5 slices of bacon
  • 2 medium shallots, finely chopped
  • 2-3 cloves of garlic, thinly sliced
  • 1 tsp thyme leaves
  • 6-8 sage leaves
  • 1 1/2 cup canned pumpkin purée
  • 3/4 cup canned tomato, crushed
  • 3/4 cup chicken stock
  • 3/4 cup pasta water
  • 1/4 cup parmesan, grated
  • 1/2 cream (or half and half)
  • pinch of ground cinnamon
  • pinch of ground nutmeg
  • Salt and pepper to taste
  • 2 tbsp olive oil
  • 500 grams Bucatini
  • Micro greens for garnish (optional)

Method

Start by bringing a large pot of heavily salted water to boil.  Don’t be shy with the salt.  Cook pasta about 2 minutes less than package directions so it’s very al dente.  It will continue to cook once it’s in the sauce.  Make sure to save at least 1 cup of the pasta water once the pasta has been cooking for a while.

While the pasta water is heating, get a large pan going on medium heat and fry the bacon until it’s crisp.  Remove bacon to paper towel.  Add the onions along with the sage and cook until the onions are translucent stirring often, about 5-7 minutes.  When the onions are translucent, add in the garlic and thyme and allow them to cook for about a minute more, stirring so the garlic doesn’t burn.

Add the pumpkin  to the pan as well as a small pinch of cinnamon and nutmeg and allow it to cook in the oil for a few minutes while stirring.  Add in the tomato and chicken stock and allow it to reduce slightly.  Now it’s time to add the Pasta.  If you were able to time it right, you can transfer the pasta directly from the cooking water into the sauce but if you already strained the pasta that’s fine too. Crumble most the bacon on top and then add the reserved cooking water and cream to the pan along with the parmesan and toss everything together really well.  I like to get in there with a pair of tongs and really mix everything up.  If the sauce is too thick at any point just add a bit more pasta water or stock.

Transfer the pasta to plates or bowls and top with remaining bacon and some more fresh thyme if desired.  I also topped my pasta with some micro greens for a bit of additional color.

post

Pumpkin Rolls with Apple-Cinnamon Filling

Pumpkin Cinnamon buns

Pumpkin Rolls with Apple-Cinnamon Filling

Firstly, I want to apologize for not posting any new recipes in a while.  I’ve been super busy but am going to try to continue posting on a more regular basis.

Now that that’s out of the way, lets talk about these cinnamon rolls.  There not you’re average cinnamon rolls.  They have pumpkin in the dough, and apples in the filling.  I’ll be honest, I’ve never really been a fan of pumpkin, but I figured I must be missing something since every recipe this time of the year seems to have pumpkin in it.

That being said, I wanted to try out a pumpkin recipe.  I also wanted to eat cinnamon rolls. So that’s how this happened.   I think this was a good place for me to try it out.  The rolls definitely had a pumpkin flavor, but it was subtle and not overpowering at all.  It also seemed to blend perfectly with the apple cinnamon filling.

These rolls would be perfect on any fall weekend, but I think would be especially good for a thanksgiving brunch.

Pumpkin cinnamon buns

Pumpkin Rolls with Apple-Cinnamon Filling

Ingredients

Dough

  • 3 1/2 cups all purpose flour, plus extra for dusting
  • 2/3 cup pure pumpkin purée (I used canned, but homemade would work great if you have)
  • 1/4 cup butter, unsalted
  • 1/2 cup whole milk
  • 1 large egg
  • one 8 gram package of active dry yeast
  • 1/4 cup granulated sugar
  • 1/4 cup brown sugar
  • 1 teaspoon salt
  • 1 teaspoon ground cinnamon
  • 1/4 teaspoon ground nutmeg
  • 1/4 teaspoon ground cinnamon
  • Oil for coating bowl while rising

Filling

  • 3 tablespoons butter
  • 2 granny smith apples, peeled and grated
  • 1 cup brown sugar
  • 1 tablespoon ground cinnamon

Frosting

  • 4 oz of softened cream cheese
  • 2 cups powdered sugar
  • 2 tablespoons whole milk
  • Splash of Vanilla

Method

To make the dough, start by gently heating milk in a small saucepan (about 110°F) you want it to be warm, not hot. Turn off the heat and add in the yeast giving it a stir to dissolve.  Allow 5-10 minutes for the yeast to activate.  The milk should look foamy. If it’s not, the yeast may have gone bad. While the yeast is activating, melt the butter (1/4 cup) and allow it to cool slightly.

In the bowl of a stand mixer, combine the flour, sugar, salt, and spices.  Give it a quick stir to combine before adding the melted butter, egg, pumpkin and the milk/yeast mixture.  With the dough hook attached, mix on low for about 5 minutes stopping to scrape down the edges if necessary.

Add mixture to a large boil greased with oil and cover with plastic wrap.  Allow it to rest in warm place until doubled in size, this should take about an hour to an hour and a half.

When the dough is almost ready, prepare the filling. Start by peeking and grating the apples into a paper towel lined bowl.  Give the apples a bit of a squeeze in the paper towel to get rid of excess moisture. Combine the apples with brown sugar and cinnamon and stir to combine.  Melt the butter and set it aside for now.

Dump the dough onto a floured surface and dust the top with a sprinkle of more flour.  Roll out the dough into a large rectangle (I try to aim for 16″x12″ but it doesn’t need to be exact).  Brush on the melted butter in order to fully coat the dough and then top with the apple cinnamon mixture trying to spread it as evenly as possible.  From the long end, roll the dough into a tight cylinder and slice into individual buns (about 1 1/2″) Don’t worry if you lose a bit of filling, this step tends to be a little bit messy.  I got 12 large buns out of this, cutting into about 1 1/2 inch pieces give or take.  You can go smaller depending on how many rolls you want to get.

In a parchment paper lined baking pan (9″x11″), evenly place the rolls leaving a bit of space between them (don’t worry, they will continue to rise and expand while cooking so that there are no gaps).  Cover the pan with parchment and allow to rise for another 30 minutes before baking.

Preheat the oven to 350°F and bake for about 35 minutes or until golden brown and puffed up.  Keep an eye on them because the time will vary depending on your oven and the size of your rolls.

Prepare the frosting while the buns are baking by beating the cream cheese in a stand mixer with the paddle attachment.  Once it is fluffy, add in the powdered sugar and continue to beat on low while slowly adding the milk along with a splash of vanilla.  You can adjust the consistency by adding more milk to thin it out or more sugar to thicken it.

When the buns are ready you can choose to glaze them all right in the pan, or serve the icing separately.