post

Blueberry Buttermilk Pancakes

Buttermilk Pancakes

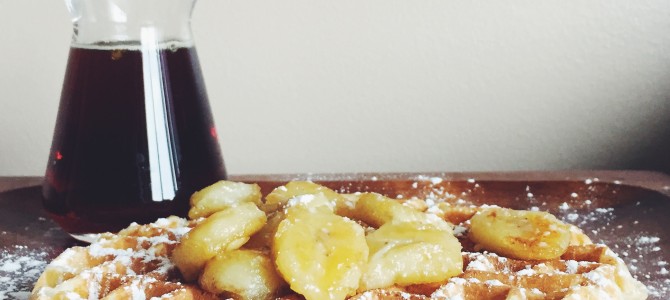
Incase you couldn’t tell, I like breakfast foods a lot, and these buttermilk pancakes are no exception.  They are quick and easy to make, and can be really impressive when they are all dressed up.   Serve them with fresh fruit and maple syrup for an amazing brunch or breakfast.  Feel free to customize the recipe by adding chocolate chips, chopped nuts, or your favorite berries to the batter for an extra burst of flavor and texture.  Recipe below!

Ingredients

  • 2 cups all purpose flour
  • 2 cups buttermilk
  • 2 tbsp sugar
  • 2 large eggs
  • 5 tbsp unsalted butter, melted2 tsp baking powder
  • 1 tsp baking soda
  • ½ tsp salt

Method

  1. Combine flour, sugar, baking powder, baking soda, and salt in a large mixing bowl
  2. Combine beaten eggs, buttermilk, and melted butter in a separate bowl
  3. Form a well in the center of the dry ingredients and slowly pour in the wet mixture. Stir just until combined trying not to over mix.
  4. Ladle about ½ cup of batter onto a med-high heat pan that has been lightly greased with vegetable oil
  5. Flip the pancake when bubbles start to form on the surface, this should take couple of minutes
  6. Keep the pancakes warm in a 250 degree oven until ready to serve

Pictured with my pancakes is a blueberry compote that is super simple to make. Read how below.

 Blueberry Compote

Ingredients

  • 2 cups frozen blueberries
  • 1 tbsp brown sugar
  • 3 tbsp water
  • 1 tsp lemon juice

Method

  1. Combine all ingredients in a small saucepan over med-high heat
  2. When the mixture comes to a boil, reduce heat to low and simmer
    for about 10 minutes
  3. If the mixture becomes too thick, add a bit more water to thin it
    out
  4. Serve warm on top of pancakes (any leftover can be refrigerated
    for several days)
post

Buttermilk Waffles

Buttermilk Waffles

Waking up is easy with these delicious and fluffy buttermilk waffles.  You can have these ready in less than 30 minutes start to finish.  You can even prepare the batter the night before and keep it in the fridge for a real no fuss breakfast.  These waffles are great on their own with some maple syrup or you can dress them up with fresh berries, Nutella, bananas, or whatever your hungry heart desires.  Check out the recipe below!

Ingredients

  • 2 cups buttermilk
  • ½ cup unsalted butter, melted (1 stick)
  • 2 cups all-purpose flour
  • ¼ cup brown sugar (can use regular if you want)
  • 2 tsp baking powder
  • 1 tsp soda
  • 1 tsp ground cinnamon
  • ½ tsp salt
  • 2 tsp vanilla extract
  • 2 eggs, beaten

Method

  1. Combine buttermilk, melted butter, beaten eggs, and vanilla in a mixing bowl
  2. In a separate bowl, combine flour, sugar, baking powder, baking soda, cinnamon, and salt
  3. Form a well in the center of the dry ingredients and slowly pour in the wet ingredients until a smooth batter forms
  4. Heat waffle iron and spray with non-stick cooking spray
  5. Pour in about 1/3 cup of batter depending on the size of your waffle maker and cook until done; this should only take a couple of minutes
  6. You can preheat your oven to 250 degrees to keep the waffles warm as they come out

I like my waffles with caramelized banana.  Check out how to make them below: 

Caramelized Bananas

 Ingredients

  • 2 ripe bananas, sliced
  • 2 tbsp unsalted butter
  • 2 tbsp brown suger
  • Bourbon (optional)

Method

  1. Melt butter in pan on med-high heat
  2. Add sliced bananas along with the brown sugar and give the pan a good toss
  3. If you want to, add a splash or two of your favorite bourbon (This step is completely optional)
  4. Continue to cook for about 5 minutes until the bananas soften and it starts to get slightly syrupy
post

Cheeseburger spring rolls

I first heard of cheeseburger spring rolls at a restaurant called Lee in Toronto.  It’s one of their signature items so I figured they had to be good.  And I was right.  They were good. Really good.  So good that I had to try making them myself.  It may seem like a weird combination but I’m telling you, it just works.  They are also really versatile. You can serve them on their own, with dipping sauce, or put them on lettuce “buns” and dress them up like you would an actual burger.  The possibilities are endless.  Give these cheeseburger spring rolls a try; you won’t be disappointed.  Recipe below!

Ingredients

  • Spring roll wrappers
  • 1 pound ground beef
  • 1 cup shredded cheddar cheese
  • ½ white onion
  • ½ tbsp mustard
  • Salt + pepper
  • Olive oil
  • Canola or vegetable oil for frying
  • 1 teaspoon flour
  • 1 teaspoon water

Method

  1. Finely dice the onion and add it to a hot pan with olive oil
  2. Cook onion for a few minutes until it starts to soften
  3. Add the beef to the pan and break it up into smaller pieces
  4. Season with salt and pepper and add the mustard
  5. Brown the beef but do not fully cook it (it will finish cooking later)
  6. Remove the beef from pan and drain excess oil
  7. Combine the shredded cheese with beef
  8. Mix flour and water together to form a “glue” for the spring rolls
  9. To form spring rolls add about a tablespoon of the mixture onto the wrappers with the corner facing away from you so it looks like a diamond. You want to place the mixture near the top of the wrapper. Fold the top towards you, wrapping the beef tightly and fold the outer to edges towards the center. Tightly roll towards you and seal with the flour/water mixture. Repeat until you’ve used up all the beef.
  10. Heat canola or vegetable oil to 350 degrees and deep fry the spring rolls for about 5 minutes or until golden brown
post

Cinnamon Buns

What better way is there to start off your day that with a batch of warm cinnamon buns?  They seem like they can be a little intimidating to make but if you take your time, they’re actually pretty straightforward.  All the time you put into them will be totally worth it when they come out of the oven and are ready to be iced.  Not to mention they will make your kitchen smell amazing.  Be sure to make these cinnamon buns for your next lazy Sunday. Recipe below!

Ingredients

Dough:

  • 1 cup whole milk
  • ½ cup sugar
  • ⅓ cup melted butter
  • 1 package (8g) active dry yeast
  • 1 tsp salt
  • 2 large eggs
  • 4 cups all purpose flour

Filling:

  • 1 cup brown sugar
  • 3 tbsp cinnamon
  • 1/3 cup softened butter

Icing:

  • 6 tbsp softened butter
  • 1.5 cups powdered sugar
  • ¼ cup cream cheese, softened
  • 1 tsp vanilla
  • pinch of salt

Method

  1. Dissolve yeast in warm (not hot) milk and allow it to activate
  2. Combine sugar, flour, melted butter, eggs, and salt using either a stand mixer or an electric hand mixer until well incorporated
  3. Lightly grease a large bowl put dough in it to proof in a warm place for about an hour until it has roughly doubled in size
  4. While the dough is rising, combine butter, brown sugar, and cinnamon in a bowl and mix until fully incorporated to make the filling.
  5. Roll out the risen dough on a lightly floured surface to form a rectangle that is approximately 12”x16” and square off the edges
  6. Evenly spread the filling on top of the dough; take your time in order not to tear the dough
  7. Working from the long end, roll the dough to form the buns until you reach the other end
  8. Slice the rolled dough into 12 even pieces and place into a lightly greased 9”x13” baking pan; cover and allow to rise another 30 minutes
  9. Pre-heat oven to 350 degrees and bake for 20 minutes or until lightly golden brown
  10. To make the icing, combine all of the icing ingredients using an electric or stand mixer and mix until airy and light
  11. Spread the icing over the buns before serving
post

Deep Fried Mac and Cheese Burger

Sometimes you need a big juicy cheeseburger.  Other times you need a warm bowl of macaroni & cheese.  But what about those times where what you really NEED is both.  Finally, a solution to one of life’s biggest dilemmas has been solved.  I present to you, the mac & cheeseburger.  It brings together two worlds of cheesy goodness into one delicious package.  Not to mention the addition of deep fried goodness; because everything is better deep fried.  Find out how to make it in the recipe below!

Deep fried mac and cheese

Ingredients:

  • Leftover mac ‘n cheese that has been refrigerated
  • flour
  • egg
  • panko bread crumbs
  • salt+pepper
  • vegetable oil for frying

Method:

  1. Form the leftover mac into balls (think meatballs) and freeze to firm up until ready to use
  2. Set up a breading station with 3 bowls. bowl 1 should contain flour, bowl 2 should contain beaten egg, and bowl 3 should contain the panko. season the flour and bread crumbs with salt+pepper and any additional spices of your preference such as cayenne.  You can also add some hot sauce to the egg mixture.
  3. One by one, put the frozen mac ‘n cheese balls into bowl 1,2,3 (in that order) ensuring it is completely coated at each stage
  4. Heat oil to 350 degrees and carefully drop in the breaded mac ‘n’ cheese balls. Cook for 5-6 minutes until golden brown. Remove the balls and drain excess oil

For the Burger

Ingredients:

  • Organic ground beef
  • Sliced cheddar cheese
  • Bun
  • Salt+pepper
  • Toppings – Lettuce, tomato, onion, jalapeños,
  • Sriracha mayo or sauce of your choosing
  • Deep fried mac ‘n’ cheese balls

Method:

  1. Form the ground beef into 1/2 pound patties by hand or using a burger press (make it bigger than you want it because it will shrink)
  2. Heat your pan (cast iron is ideal but anything should work) over medium-high heat and melt butter in it
  3. Generously season one side of the burger with salt and pepper (you’ll season the other side once it’s cooking)
  4. Place seasoned side down and make an indentation with your thumb in the middle to keep the burger from bulging
  5. Cook 3-4 minutes per side until pink and juicy on the inside. place a slice of cheese on top when its almost done.
  6. Toast and butter the bun while the burger is cooking

To assemble the burger, put sauce on the bottom bun and then place lettuce, tomato, and onion on it. Place the burger ontop of your toppings and top with jalapeños.  Take you’re fried mac ‘n cheese and put it on the burger (you can cut them in half to expose the inside or leave them whole). Squish everything down with the top bun and dig in!

post

Mac & Cheese

Can you think of any food more comforting than big a bowl of mac & cheese?  I don’t think I can.  It really is the perfect comfort food. It’s warm, cheesy, crispy, and so satisfying.  It’s got it all going on.  It makes for a great lunch or a great dinner.  It can be made for casual and also for special occasions. I really don’t see why you’d ever need to eat anything else. And good news, it also couldn’t be simpler to make.  Whether you’re a first time cook or a chopped champion, I promise that you can do it.  Just follow the recipe below!

Ingredients:

  • 1/2 box elbow macaroni noodles (half a pound)
  • 1/4 cup butter
  • 1/4 cup flour
  • 2.5 cups whole milk
  • 1 teaspoon salt
  • 1 teaspoon black pepper
  • 4 cups of cheese (2 cups cheddar, 1 cup Monterey Jack, 1 cup Gruyere)*


Method:

  1. preheat oven to 400 degrees
  2. Cook pasta according to package directions, drain and set aside
  3. Melt butter in a medium saucepan, add flour and whisk to combine
  4. Pour milk into saucepan and continue to whisk until the sauce thickens
  5. Slowly add 3 cups of cheese to the pan and mix until the sauce has reached a smooth consistency. Season with salt and pepper.
  6. Put the noodles into a lightly greased cast iron pan or oven safe dish, pour the sauce over and combine.
  7. Top the noodles with remaining cheese and bake for 20 minutes or until the cheese is bubbly and delicious
  8. Enjoy!

*if these cheeses don’t sit well with you, feel free to swap it for your favourite kind. Just be sure to use the same amount.