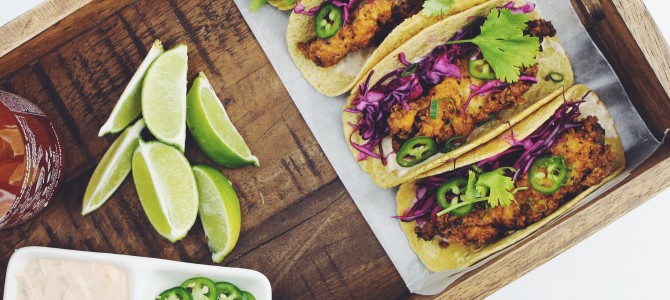
Sriracha Fried Chicken Tacos
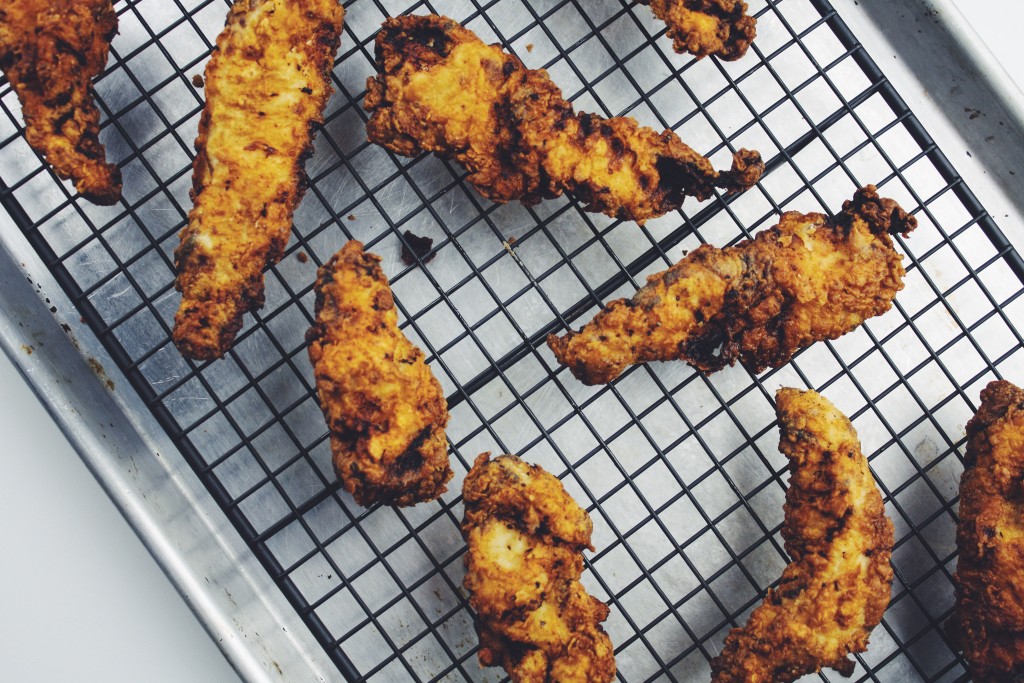
Fried chicken probably doesn’t immediately come to mind when you think of tacos, but it should, because these tacos are amazing. It all starts with the chicken. This chicken is super crisp on the outside and extremely tender on the inside. It’s marinated in buttermilk and Sriracha overnight to ensure it stays juicy when cooked. Before it gets fried, the chicken gets a coating in flour that’s seasoned with garlic and Korean chilli flakes, for a kick of extra heat.
Sounds pretty good so far right?
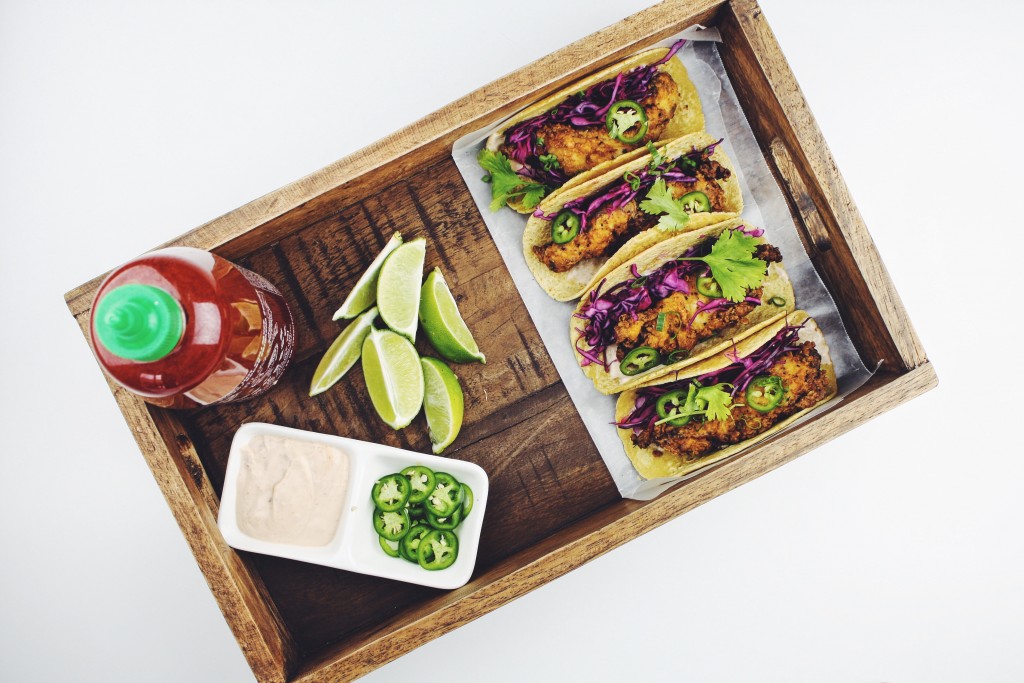
You could probably stop there and call it a day, but why would you when you can turn it into an amazing taco? To make the taco, the chicken is topped with a bright and citrusy slaw and then garnished with fresh jalapeno and thinly-sliced green onion. The sauce is a spicy crema made with sour cream, Sriracha and soy. All wrapped in a warm corn tortilla. Part of what makes these tacos so amazing is the contrast of textures you get. The chicken is crispy and juicy at the same time. The slaw and jalapenos are refreshing and crisp while the tortilla is soft and warm. It is truly an incredible taco experience.
Ingredients
For the Chicken
- 1 lb boneless skinless chicken breasts
- 1 cup buttermilk
- 1 cup all-purpose flour
- 2 tbsp Sriracha
- 2 tsp salt
- 1 tsp garlic powder
- 1 tsp Korean chilli flakes*
- Canola oil for frying
For the Toppings
- ¼ purple cabbage (shredded)
- 1 lime (juiced)
- 1 tsp sesame oil
- 1 jalapeno (thinly sliced)
- 2 green onions (thinly sliced)
- ½ cup sour cream
- 1 tbsp Sriracha
- 1 tsp soy sauce
- Small handful of cilantro
- Corn tortillas
- Salt & pepper
Method
- The night before you plan to make these, slice the chicken into 1 inch (2.5 cm) thick pieces as if you were making chicken tenders. Place them in a bowl or freezer bag and cover with the buttermilk and Sriracha. It helps if you add the Sriracha to the milk first so it distributes evenly. Cover and keep in fridge to marinate overnight.
- Thinly shred ¼ of a purple cabbage and dress it with the juice of one lime and sesame oil. Season to taste with salt and pepper. Keep in fridge until ready to use.
- To make the sauce, combine the sour cream with 1 tbsp of Sriracha (feel free to add more if you want it spicier) and the soy sauce. Stir together and keep in fridge until ready to use.
- To get the chicken ready for frying, heat your oil to 350°F. Remove chicken from fridge and set up a medium bowl with the flour, salt, garlic powder, and chilli flakes. Stir the flour mixture together well. Working one piece at a time, remove the chicken from the buttermilk and place into the flour to fully coat it. Place coated chicken on parchment lined backing sheet until ready to fry.
- Pre-heat oven to 200°F. When all the chicken is coated, carefully place into hot oil. Fry for 6-7 minutes or until they have reached an internal temperature of 165°F. Remove and allow excess oil to drain on wire rack or paper towel and keep in oven to stay warm until ready to build tacos. Only fry 4-5 pieces at a time so the oil temperature doesn’t drop too much.
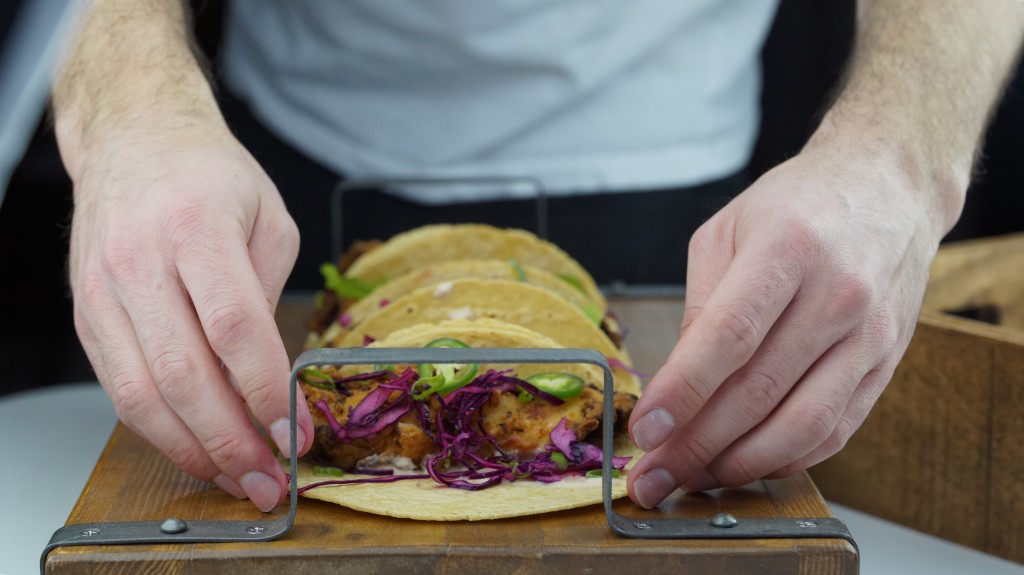
- Before assembling tacos, quickly warm tortillas in a dry pan over medium heat. To build, spoon a layer of sauce onto the centre of tortilla and then place on a piece of fried chicken. Top with slaw, jalapenos, and green onion. Garnish with cilantro leaves and drizzle on more Sriracha if desired
*Korean chili flakes are available in most Asian grocery stores. If unavailable feel free to substitute for cayenne pepper.